TED, Meet Enphase..

Now that we are getting graphs from both TED and Envoy I wanted to combine them to get a graphical representation of production vs. Usage. The heavy lifting is done, just need to stuff it into a graph and cron it:
#!/bin/bash#Create the combined daily graph

rrdtool graph /var/www/html/solar/combine_day.png -s -1day DEF:ted_watts=/etc/ted/watts/ted_watts.rrd:temp:AVERAGE LINE1:ted_watts#FF9900 -h 400 -w 600 -y1:2 --color GRID#dddddd --color MGRID#aaaaaa DEF:enphase=/etc/enphase/enphase.rrd:temp:AVERAGE LINE1:enphase#FF0000 -h 400 -w 600 -y1:2 --color GRID#dddddd --color MGRID#aaaaaa

#Create the combined weekly graph

rrdtool graph /var/www/html/solar/combine_week.png -s -1week DEF:ted_watts=/etc/ted/watts/ted_watts.rrd:temp:AVERAGE LINE1:ted_watts#FF9900 -h 400 -w 600 -y1:2 --color GRID#dddddd --color MGRID#aaaaaa DEF:enphase=/etc/enphase/enphase.rrd:temp:AVERAGE LINE1:enphase#FF0000 -h 400 -w 600 -y1:2 --color GRID#dddddd --color MGRID#aaaaaa

#Create the combined monthly graph

rrdtool graph /var/www/html/solar/combine_month.png -s -1month DEF:ted_watts=/etc/ted/watts/ted_watts.rrd:temp:AVERAGE LINE1:ted_watts#FF9900 -h 400 -w 600 -y1:2 --color GRID#dddddd --color MGRID#aaaaaa DEF:enphase=/etc/enphase/enphase.rrd:temp:AVERAGE LINE1:enphase#FF0000 -h 400 -w 600 -y1:2 --color GRID#dddddd --color MGRID#aaaaaa

#Create the combined yearly graph

rrdtool graph /var/www/html/solar/combine_year.png -s -1year DEF:ted_watts=/etc/ted/watts/ted_watts.rrd:temp:AVERAGE LINE1:ted_watts#FF9900 -h 400 -w 600 -y1:2 --color GRID#dddddd --color MGRID#aaaaaa DEF:enphase=/etc/enphase/enphase.rrd:temp:AVERAGE LINE1:enphase#FF0000 -h 400 -w 600 -y1:2 --color GRID#dddddd --color MGRID#aaaaaa

# All the rrd sctipts we created need to go into roots crontab. I have everything run a 5 minute intervals

*/5 * * * * /usr/local/bin/ted_watts.sh > /dev/null 2>&1
*/5 * * * * /usr/local/bin/enphase.sh > /dev/null 2>&1; /usr/local/bin/combined_solar.sh > /dev/null 2>&1

##Here is the final daily product. TED is Orange, Enphase is Red.

Daily:

Weekly:

Month:

# Here it is with no mark-up
#!/bin/bash#Create the combined daily graph
rrdtool graph /var/www/html/solar/combine_day.png -s -1day DEF:ted_watts=/etc/ted/watts/ted_watts.rrd:temp:AVERAGE LINE1:ted_watts#FF9900 -h 400 -w 600 -y1:2 –color GRID#dddddd –color MGRID#aaaaaa DEF:enphase=/etc/enphase/enphase.rrd:temp:AVERAGE LINE1:enphase#FF0000 -h 400 -w 600 -y1:2 –color GRID#dddddd –color MGRID#aaaaaa

#Create the combined weekly graph
rrdtool graph /var/www/html/solar/combine_week.png -s -1week DEF:ted_watts=/etc/ted/watts/ted_watts.rrd:temp:AVERAGE LINE1:ted_watts#FF9900 -h 400 -w 600 -y1:2 –color GRID#dddddd –color MGRID#aaaaaa DEF:enphase=/etc/enphase/enphase.rrd:temp:AVERAGE LINE1:enphase#FF0000 -h 400 -w 600 -y1:2 –color GRID#dddddd –color MGRID#aaaaaa

#Create the combined monthly graph
rrdtool graph /var/www/html/solar/combine_month.png -s -1month DEF:ted_watts=/etc/ted/watts/ted_watts.rrd:temp:AVERAGE LINE1:ted_watts#FF9900 -h 400 -w 600 -y1:2 –color GRID#dddddd –color MGRID#aaaaaa DEF:enphase=/etc/enphase/enphase.rrd:temp:AVERAGE LINE1:enphase#FF0000 -h 400 -w 600 -y1:2 –color GRID#dddddd –color MGRID#aaaaaa

#Create the combined yearly graph
rrdtool graph /var/www/html/solar/combine_year.png -s -1year DEF:ted_watts=/etc/ted/watts/ted_watts.rrd:temp:AVERAGE LINE1:ted_watts#FF9900 -h 400 -w 600 -y1:2 –color GRID#dddddd –color MGRID#aaaaaa DEF:enphase=/etc/enphase/enphase.rrd:temp:AVERAGE LINE1:enphase#FF0000 -h 400 -w 600 -y1:2 –color GRID#dddddd –color MGRID#aaaaaa

Band Saw Mill Sled


Started clearing the property and we have some logs smaller logs I want to try to mill up myself.
 
Started by cutting a ¾” sheet of plywood to 24” x 36” and adding in 2, 18” T-Tracks
Measured the distance from the blade side of the miter slot to the blade and used that distance to screwed on the miter bar. Sanded it down and good coat of wax.
Cut 2 13”x36” pieces and put 3/4” rabbits on the ends and back and a 3/4” dado directly in the center:
On one I cut 2 1/4” slots in:
 
Cut 3 support pieces, put a curve on them and glued them in place. Also drilled holes for the T-Track bolts and knobs.
Setup my rollers and mounted everything up:
 
Used the slots to secure the log with screws and went for it:
Think it worked out pretty good:

Getting out of Hot Water!


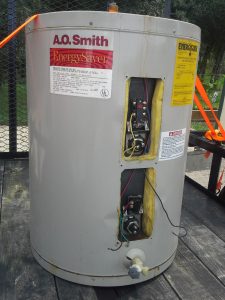
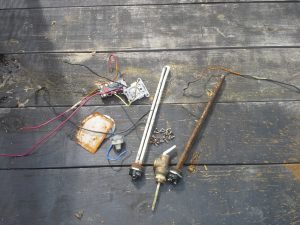
We were given non-working electric hot water heater. I think it is 40 gallon, it is shorter than a standard type I have seen in the past.
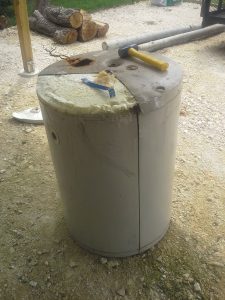
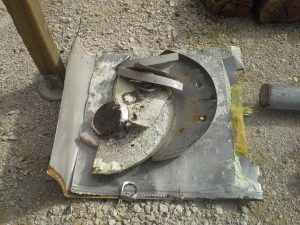
I started taking it apart by removing everything from the front panels and making a couple cuts with my 4 inch angle grinder. One down the side seam and 1/3’d it on the top and bottom. Very thin sheet metal, cuts were quick and easy:
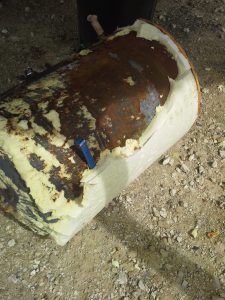
The bottom had 1 inch thick Styrofoam glued to it and the rest was spray foam.
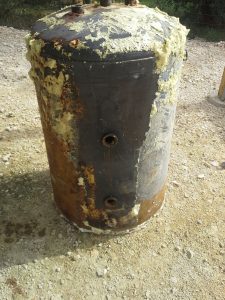
Took me about 45 minutes to get it all off:
Going to recycle the rest:
Not sure what I am going to do with the tank yet. Looking like either a Driveway roller for the Tractor or a smoker…

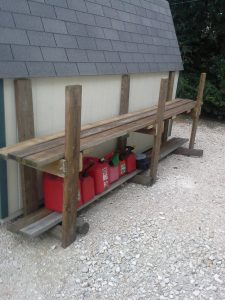
Reclaimed Wood Shelf


The previous owner was kind enough to leave us some 2x6x12’s de-nailed, clean and stacked keeping them straight. Decided to use some of them for a shelf next to one of our sheds.
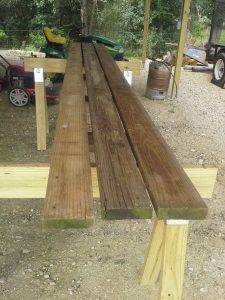
Started by making the shelf. The shed happens to be as long as the boards. Cut 5 18 inch pieces and nailed 3 boards to them:
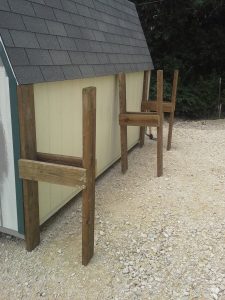
Then made the legs. Made it in sections so the wife and I could move it into its location.
Leveled it out, added the shelf and a few boards on the bottom:

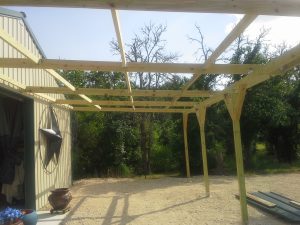
Elgin Side Awning – The Big Cover Up

Here is the front “big” awning. We attached a frame for the awning to a metal building the same way we did the other awning; We used the self sealing metal roof screws to attach the brackets to the side. The brackets are screwed into the 2×6’s used to frame the building. VERY secure!
I wanted to show a better shot of how we did the footings with the 4×4 brackets. We used the 12 inch round forms 2 feet long with 2 1/2 bag cement each
The framing is pretty much the same as the other awning, except the cross beam 2×4’s are set in between the 2×6’s and we used metal braces to help support:
Here is a shot with all the framing done and the brackets on.
Started attaching the metal roofing:
Here is a shot with all the roofing on:
Still need to add the end and side flashing. Will do the electrical next

The Elgin Front Awning – Just a little cover-up

My side walk thru door was getting hammered with rain creating the potential for mold. To help keep everything dry, we built an awning.
I could not find info on how to attach a frame for an awning to a metal building, here is what we did. I used the self sealing metal roof screws to attach the brackets to the side. The brackets are screwed into the 2×6’s used to frame the building. VERY secure!
Then we drilled holes and bolted the 4×4’s to the brackets set in concrete and started framing.
For extra support I cut and drilled 4×4’s for side support:
Then finished up the framing:
Here it is with the metal sheets attached.
Still need to add the end and side flashing, but in my opinion the big part is done.

Elgin Shop – Getting all the storage I can – Under the Out Feed Table

I noticed unused storage space under my out feed table. So I made some simple boxes to store what I can in the unused space.
I started by cutting 3 – 2 foot by 4 foot bases out of some left over plywood I had laying around. Then I screwed on some 2×6 decking boards:
Then put on 4 2 inch casters from Harbor Freight:
I got some storage containers from the Dollar Tree filled them up and labeled them:
Then slid it into place: